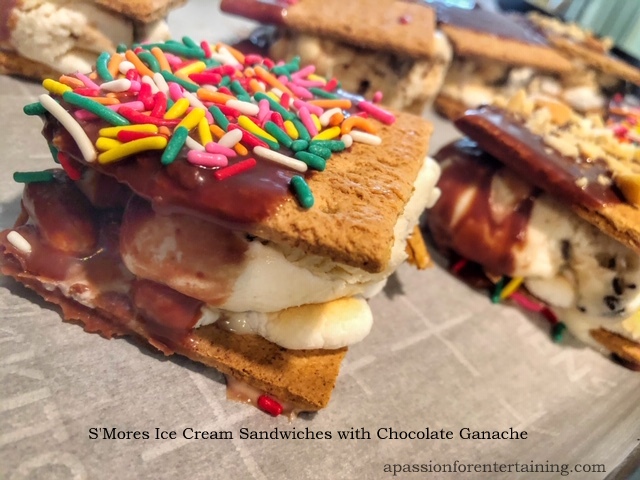
S’mores Ice Cream Sandwiches Dipped in Chocolate Ganache

School’s out for the summer and it is time to think about fun summer food. S’mores always come to mind especially when I smell a fire pit roaring. I thought it might be fun to make ice cream sandwiches that taste like a S’more. I layered graham crackers with marshmallows, toasted them under the broiler, added a scoop of ice cream, topped them with another graham cracker and dipped them in chocolate ganache. For fun I dipped some in assorted sprinkles and a few in crushed salted cashews. These are so easy to make and just the thing for a warm summer night. You can make these ahead and have them ready in the freezer. Especially nice since we are not as likely to venture out as much as we used to and staying home more than we are accustomed to!
One of my taste testers, I think he likes it!
5 from 1 vote
Print

S’Mores Ice Cream Sandwiches Dipped in Chocolate Ganache

Servings 8

Ingredients

  • 16 2 1/2 inch squares honey graham crackers
  • 80 mini marshmallows
  • 14 oz ice cream (I used assorted flavors of Haagen-Dazs ice cream)
  • 8 oz milk chocolate chips
  • 1/2 cup heavy cream
  • assorted sprinkles

Instructions

  1. Line a baking sheet that will fit in your freezer with foil. Place 8 graham cracker squares on the baking sheet. Place 10 mini marshmallows on each square. Place under the broiler and watch carefully until the marshmallows become golden brown. Remove from the broiler and cool. Remove the ice cream from the freezer and let it soften a bit to make it easier to scoop. Place one scoop of ice cream on each cracker that has the toasted marshmallows on them. Top each scoop with the top cracker. Place in the freezer until the sandwich is frozen and firm. After the sandwiches are frozen – combine the chocolate chips and cream in a microwaveable dish that is large enough to dip the sandwiches in. I used a 2 cup Pyrex measuring cup. Microwave for 30 seconds, stir, microwave for 15 seconds and stir until thick and smooth. Cool slightly. Assembly – have everything prepared because you will need to work quickly. Quickly dip each sandwich in the chocolate ganache, sprinkle with toppings if desired, place on the baking sheet. Return the baking sheet in the freezer. Freeze several hours until hard. Wrap each sandwich individually.

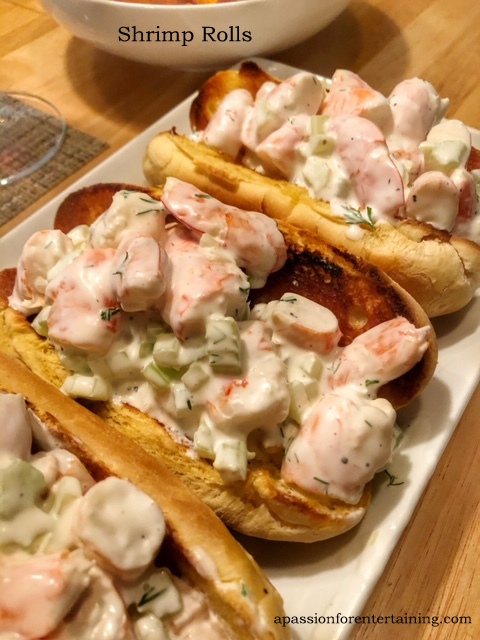
Cooking from My Freezer – Shrimp Rolls

There is nothing I like more than a wonderful lobster roll. However, I am being resourceful and using what I have in my freezer. I found a bag of precooked wild-caught jumbo shrimp in the freezer. So, out it came and time to figure out what to do with the shrimp. I also had a few hot dogs buns in the freezer (ideally they would have been split-top buns but I used what I had on hand). You guessed it, Shrimp Rolls! I thawed the shrimp, cut into large chunks and tossed in a few more ingredients I had on hand. One large scoop on a toasted bun – amazing.

Shrimp Rolls

Servings 3

Ingredients

  • 12 oz precooked jumbo shrimp
  • 2 – 3 tablespoons fat-free plain Greek yogurt
  • 1 – 2 tablespoons mayonnaise
  • 2 stalks celery, diced
  • 1 tablespoon freshly squeezed lemon juice
  • 1 – 2 teaspoons fresh dill, minced
  • salt and pepper, to taste
  • hot dog buns
  • butter

Instructions

  1. Cut shrimp into bite size pieces. Mix in a bowl with the yogurt, mayonnaise, (add one tablespoon at a time of the yogurt and mayonnaise until you reach your desired consistency), celery, lemon juice, dill, salt and pepper. Spread butter on the hot dog bun and toast under your broiler until golden brown. Fill rolls with shrimp mixture and serve.

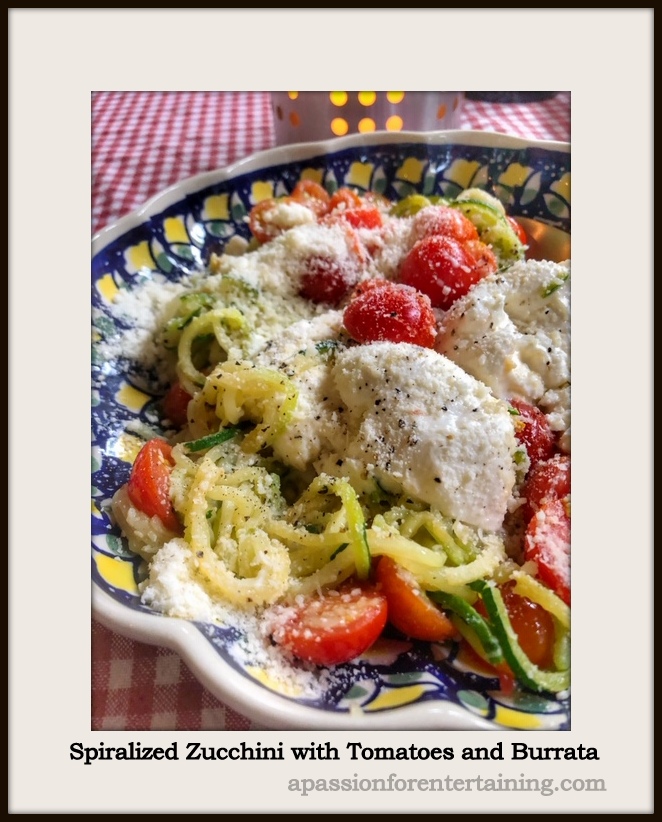
Spiralized Zucchini with Tomatoes and Burrata

Now that I keep cooking at home, I am running out of ideas for vegetables. I was at the store and found spiralized zucchini noodles and thought that would be the perfect vegetable to try. I also knew I had some Burrata in the refrigerator and cherry tomatoes at home. After a quick stir-fry of the zucchini, a touch of garlic, a toss of cherry tomatoes, a dusting of grated Parmesan and topped with Burrata – we had an incredible side dish. If you need a new and interesting vegetable, I highly recommend this delicious vegetable dish.

Spiralized Zucchini with Tomatoes and Burrata

Servings 4

Ingredients

  • 16 oz. spiralized zucchini
  • 2 tablespoons olive oil
  • 1 clove garlic, minced
  • 1 pinch crushed red pepper flakes
  • 1 cup cherry tomatoes, halved
  • 2 tablespoons finely grated Parmesan cheese
  • 8 oz. Burrata cheese
  • salt and pepper

Instructions

  1. Heat oil in a large skillet, toss zucchini in hot skillet for 3 minutes. Add the garlic and red pepper flakes and continue to cook for 1 minutes. Add the tomatoes and toss until heated through. Season with salt and pepper to taste. Place cooked zucchini in a serving dish, top with Burrata and dust with the Parmesan cheese

Quick, Easy and Delicious -Salsa Sausage Dip

When I first made this recipe, we thought it was so delicious with tortilla chips that we could hardly eat dinner since we ate so much of this dip! Five ingredients that are all readily available in your local market. Sausage, salsa, taco seasoning, cream cheese and sharp cheddar cheese. You just won’t believe what a great combination. Trust me on this one. You can also double or cut in half, depending on the number serving.

Salsa Sausage Dip

Servings 8

Ingredients

  • 1 pound ground sausage, hot, mild or sage
  • 8 oz. cream cheese, cubed
  • 1 cup salsa (mild, medium or hot – your choice)
  • 2 teaspoons taco seasoning
  • 1 cup shredded cheddar cheese
  • tortilla chips

Instructions

  1. In an oven-proof medium skillet (cast iron works great) over medium heat, brown sausage, stirring frequently to break the sausage up into small bits. Drain any excess grease. Return to the skillet, over medium-low heat, stir in cream cheese, salsa, and taco seasoning. Stir until the cream cheese has melted. At this point you can pour mixture into an oven/microwave dish; cool and refrigerate. If serving immediately, top mixture with cheese, put into a 350 oven until the cheese has melted. If you are reheating from the refrigerator, top the cooled mixture with the cheddar cheese and bake in a 350 degree oven 15 – 20 minutes or until hot and bubbly. You can also heat in the microwave – top with cheddar cheese, cover and microwave on high in 30 second increments until hot and bubbly. Serve with tortilla chips.

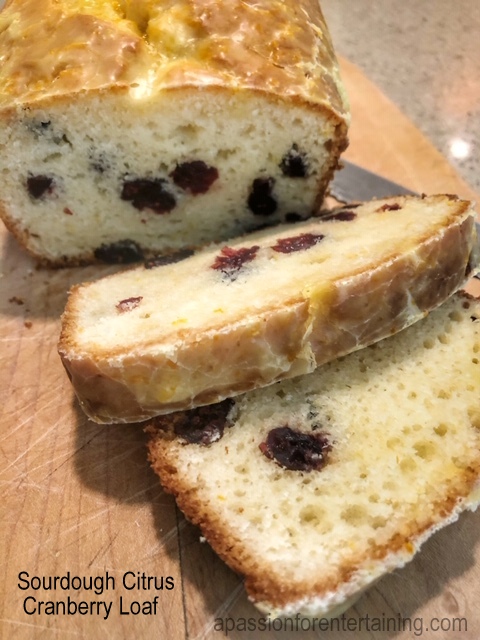
Baking with My Sourdough Starter – Sourdough Citrus Cranberry Loaf

Like many Americans, I am resorting to recipes from the past and especially Sourdough now that I have found that yeast is a treasured commodity and I have plenty of time. The recipe I used for my starter was from King Arthur flour. I have been feeding it as directed and discarding the starter as directed. Well, after about four discards I decided it was time to use the discard and not toss it. After searching many recipes and experimenting with many, I think I have come up with the perfect loaf using sourdough starter (or discard). Now that my starter is ready to go in the refrigerator, I am ready to try my hand at that perfect loaf of Sourdough Bread. In the meantime, I think this bread recipe will be one I will keep making with my wonderful new starter.

Sourdough Citrus Cranberry Loaf

Ingredients

  • 1/2 cup vegetable oil
  • 3/4 cup sugar
  • 2 eggs
  • 1 1/2 cup flour
  • 1 1/2 teaspoons baking powder
  • 1/2 teaspoon salt
  • 1/2 cup dried cranberries
  • 3 teaspoons orange zest (divided)
  • 4 teaspoons orange juice (divided)
  • 1/2 cup sourdough starter (discard)
  • 3/4 cup milk
  • 1/2 cup powdered sugar

Instructions

  1. Preheat oven to 350 degrees. Generously grease one standard loaf pan (8.5 x 4.5) set aside. Combine the flour, baking powder, salt and cranberries in a bowl, mix to combine. In a medium mixing bowl mix together the oil, sugar and eggs. Mix well with a hand mixer. Add the follow ingredients in the following order to the oil, sugar, egg mixture. 1/3 cup flour mixture, milk, 1/3 cup flour mixture, sourdough starter, remaining flour mixture – thoroughly mix after each addition. Stir in 1 teaspoon orange zest and 1 teaspoon orange juice. Mix well and pour into prepared loaf pan. Bake for 60 minutes or until a tester comes out clean. While the loaf is baking make the glaze, stir together the remaining 2 teaspoons of orange zest, remaining 3 teaspoons of orange juice and powdered sugar. Mix well, cover and set aside until bread is finished baking. Once bread is finished baking, remove from oven and let cool for 8 minutes. Remove bread from the pan and spread the warm loaf with the glaze. Let cool prior to slicing.

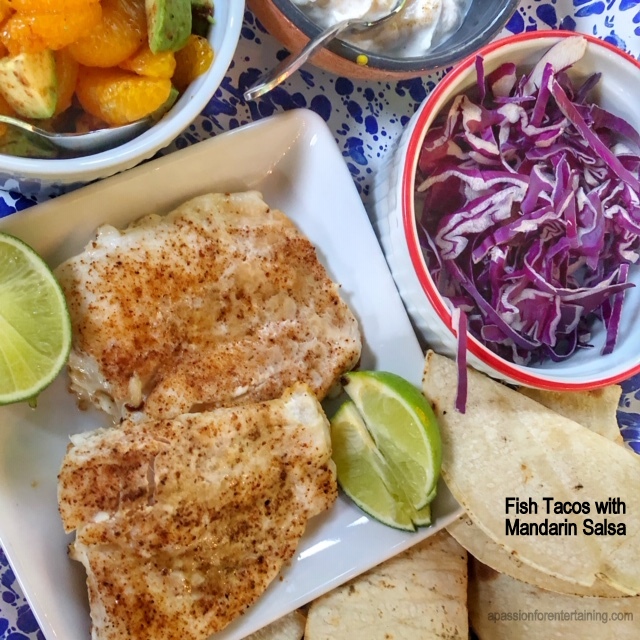
Celebrate Cinco de Mayo with Grilled Fish Tacos with Mandarin Salsa

I wish I had kept a log starting on day one of all of the dinners I have cooked since staying at home. This is by far the longest stretch of cooking I think any of us have encountered. So, for Cinco de Mayo celebrations this week here is a quick, easy and delicious recipe.

Grilled Fish Tacos with Mandarin Salsa

Ingredients

  • SALSA
  • 1 15 oz can mandarin oranges, drained
  • 1 avocado, diced
  • 1-2 tablespoons finely chopped red onion (optional)
  • 1 teaspoon chili powder
  • YOGURT CREMA
  • 3/4 cup plain greek yogurt
  • 1 tablespoon lime juice, freshly squeezed
  • 2 teaspoons cumin
  • FISH
  • 1 piece white fish fillet per person, haddock, cod or what you have on hand
  • 1 tablespoon oil
  • cumin, chili powder and salt
  • corn tortillas
  • 1 – 1 1/2 cup shredded red cabbage

Instructions

  1. Salsa – combine the mandarin oranges, diced avocado, red onion and chili powder in a bowl, mix to combine.

    Yogurt Crema – combine the yogurt, lime juice and cumin, mix to combine

  2. Grilled Fish – Preheat your grill or oven to 350 degrees. In a cast iron skillet large enough to fit the fish fillets, drizzle the skillet with oil. Add the fillets and dust the fillets lightly with cumin, chili powder and salt. Grill or bake for 8 – 10 minutes or until the fish flakes easily.

  3. How to serve you tacos

    Heat the corn tortillas over the grill – turn the tortillas with tongs until lightly charred on both sides. This can also be done over a gas flame or in a dry skillet. Set warm tortillas in a towel-lined basket to keep warm.

    Place the shredded cabbage, salsa, and yogurt crema in serving bowls along side the fish and tortillas.

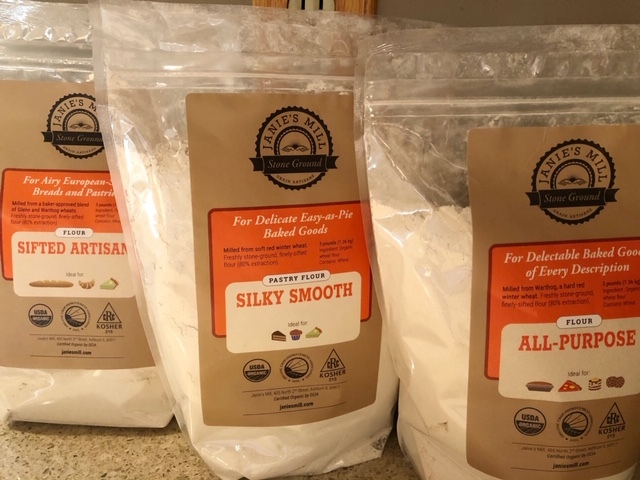
Interesting Find – Janie’s Mill Stone Ground Products

It is harder to find flour and yeast these days than paper towels. I think you probably read my post where I ordered from a local restaurant and received self-rising flour in place of all-purpose flour! So, I headed to the internet to find flour. After searching popular cooking and supply sites – all were sold out. So, I started searching for alternatives. I found an article from Food and Wine titled Where to Buy Flour Online from Smaller Mills – after reading their article, I decided to order from Janie’s Mill in Illinois. Their organic flour is stone-milled and they have many varieties to select from. I received my flour this week and I can’t wait to try the various types and their customer service is excellent. A perfect find while we are all currently home and baking!

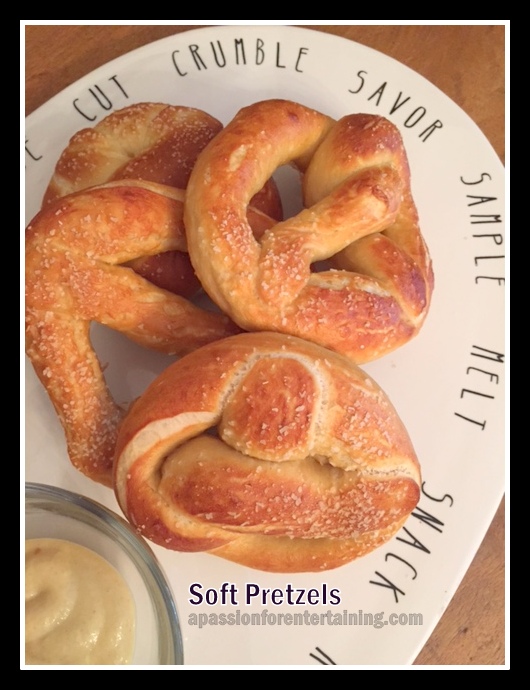
Today is National Pretzel Day!

Ready to try your hand at making soft pretzels? This recipe is easy and the results are spectacular.  To make these even more enticing, add dipping sauces of your choice.  Your family will go crazy for these.  You see the lines in the malls (when they are open!) for the soft pretzels, make them at home and you just might have a new requested treat.  Enjoy!

Soft Pretzels

Ingredients

  • 1 package rapid rise yeast
  • 1 1/2 cups warm water
  • 1/4 cup brown sugar
  • 4 – 4 1/2 cups flour
  • baking soda
  • kosher salt
  • 1 egg, beaten and mixed with 2 tablespoons of water

Instructions

  1. Preheat oven to 450 degrees.

    In a mixing bowl, combine yeast, warm water, and brown sugar. Let stand for 5 minutes. Add flour and mix with a dough hook until smooth. (if you do not have a mixer with a dough hook, by hand – gradually add flour and stir until all is incorporated. Knead dough until the mixture is smooth). Let stand 5 minutes. Fill a non-reactive deep sauce pan with water, add 2 tablespoons of baking soda for each cup of water, bring to a boil. Divide dough into 12 even pieces. Roll each piece into a long rope (approx. 18 – 24 inches), twist into a pretzel shape, pinch ends to seal. Drop each pretzel into the boiling water for 10 seconds. Remove with a slotted spoon and arrange on a greased baking sheet. Brush each pretzel with egg wash and sprinkle with salt. Bake at 450 degrees for 8 minutes or until golden brown.

    Note – If you are not planning on serving these immediately, bake without the sprinkle of salt on top. When you are ready to serve, warm the pretzels in the oven, brush with melted butter and sprinkle with salt.

Interesting Find – Virginia Tech experts to provide tips for growing food at home

Weekly, I receive numerous requests and information regarding food trends, new foods/restaurants and other articles that pertain to the food industry. I thought this article was definitely worth sharing since I too have seen a renewed interest in food production and gardening. Below is the information if you are interested in learning more about starting a home garden.

What: Gardening can be a great stress reducer. Don’t think you have the space for a garden? Wondering which plants you can or should grow? Gardening is the perfect social distancing activity – feeding a revival of interest in food production and gardening as a recreation, outdoor exercise form and community building too. Join us on Earth Day to hear from Virginia Cooperative Extension experts to help you get started!

When: Earth Day
Wednesday, April 22, 2020
4:00 p.m.

Where: Get your hands dirty with urban gardening via Zoom

Registration is required to receive the Zoom details. Submit your questions for the experts in advance.

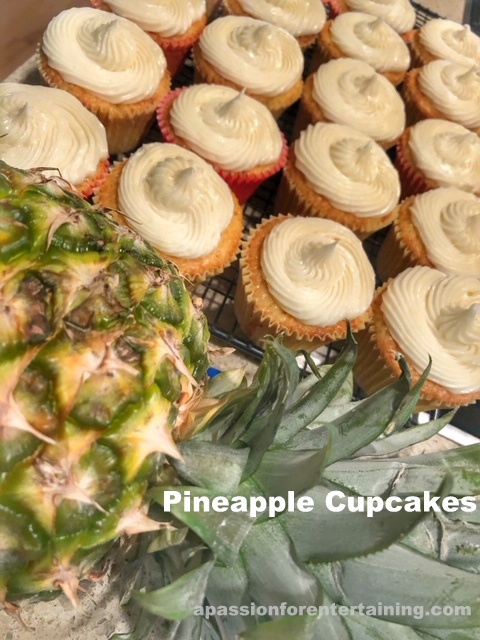
Cooking from My Pantry – Pineapple Cupcakes

I have been trying various methods for delivery and food pick-up to avoid going to the grocery store. Sometimes it is not the easiest thing to do. I ordered all purpose flour and self-rising flour was delivered. I certainly did not want five pounds of self-rising flour. However, as the saying goes “when you have lemons, make lemonade” – so I decided to switch around my pineapple cake recipe and use the self-rising flour instead of mom’s original recipe that uses baking soda. The results were terrific. One of our favorites and during this time of cooking from my pantry, a great recipe substitution was found.

5 from 1 vote
Print

Pineapple Cupcakes

Servings 20

Ingredients

  • 2 cups self-rising flour
  • 2 cups sugar
  • 2 large eggs, lightly beaten
  • 1 20oz. can crushed pineapple, with juice
  • 1 teaspoon vanilla extract

Instructions

  1. Preheat oven to 350 degrees. Line muffin tin with 20 cupcake liners. In a mixing bowl combine the flour and sugar, add the eggs, pineapple and vanilla extract. Mix until well blended, scoop into liners (approximately 3 tablespoons per liner). Bake cupcakes for 25 minutes or until a cake tester comes out clean. Cool and frost.

  2. Use can also use all purpose flour instead of the self- rising flour.

    Use 2 cups of all purpose flour and add 2 teaspoons of baking soda in place of the self-rising flour

    Instead of cupcakes this recipe will make one 9 x 13 cake – bake 30 minutes or until a cake tester comes out clean.

5 from 1 vote
Print

Cream Cheese Frosting

Ingredients

  • 1 8 oz. package cream cheese, room temperature
  • 1/4 cup butter, room temperature
  • 2 teaspoons milk
  • 1 teaspoon vanilla extract
  • 4 cups powdered sugar

Instructions

  1. Beat cream cheese, butter, milk and vanilla a medium size mixing bowl on low speed until smooth. Gradually add powdered sugar, one cup at a time, until frosting is smooth and spreadable.