Baking with My Sourdough Starter – Sourdough Citrus Cranberry Loaf

Like many Americans, I am resorting to recipes from the past and especially Sourdough now that I have found that yeast is a treasured commodity and I have plenty of time. The recipe I used for my starter was from King Arthur flour. I have been feeding it as directed and discarding the starter as directed. Well, after about four discards I decided it was time to use the discard and not toss it. After searching many recipes and experimenting with many, I think I have come up with the perfect loaf using sourdough starter (or discard). Now that my starter is ready to go in the refrigerator, I am ready to try my hand at that perfect loaf of Sourdough Bread. In the meantime, I think this bread recipe will be one I will keep making with my wonderful new starter.
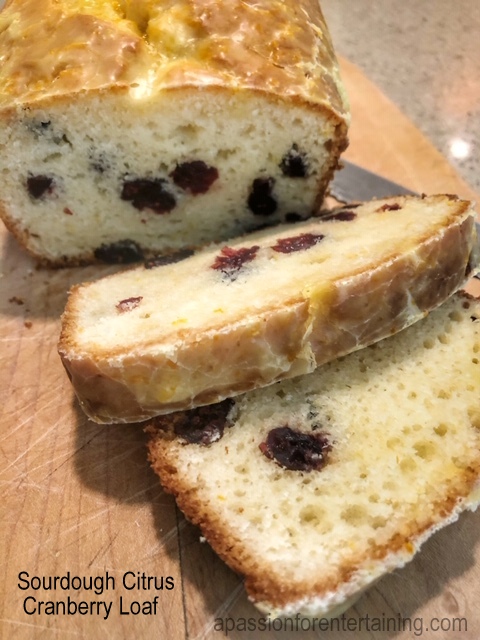
Sourdough Citrus Cranberry Loaf

Ingredients

  • 1/2 cup vegetable oil
  • 3/4 cup sugar
  • 2 eggs
  • 1 1/2 cup flour
  • 1 1/2 teaspoons baking powder
  • 1/2 teaspoon salt
  • 1/2 cup dried cranberries
  • 3 teaspoons orange zest (divided)
  • 4 teaspoons orange juice (divided)
  • 1/2 cup sourdough starter (discard)
  • 3/4 cup milk
  • 1/2 cup powdered sugar

Instructions

  1. Preheat oven to 350 degrees. Generously grease one standard loaf pan (8.5 x 4.5) set aside. Combine the flour, baking powder, salt and cranberries in a bowl, mix to combine. In a medium mixing bowl mix together the oil, sugar and eggs. Mix well with a hand mixer. Add the follow ingredients in the following order to the oil, sugar, egg mixture. 1/3 cup flour mixture, milk, 1/3 cup flour mixture, sourdough starter, remaining flour mixture – thoroughly mix after each addition. Stir in 1 teaspoon orange zest and 1 teaspoon orange juice. Mix well and pour into prepared loaf pan. Bake for 60 minutes or until a tester comes out clean. While the loaf is baking make the glaze, stir together the remaining 2 teaspoons of orange zest, remaining 3 teaspoons of orange juice and powdered sugar. Mix well, cover and set aside until bread is finished baking. Once bread is finished baking, remove from oven and let cool for 8 minutes. Remove bread from the pan and spread the warm loaf with the glaze. Let cool prior to slicing.

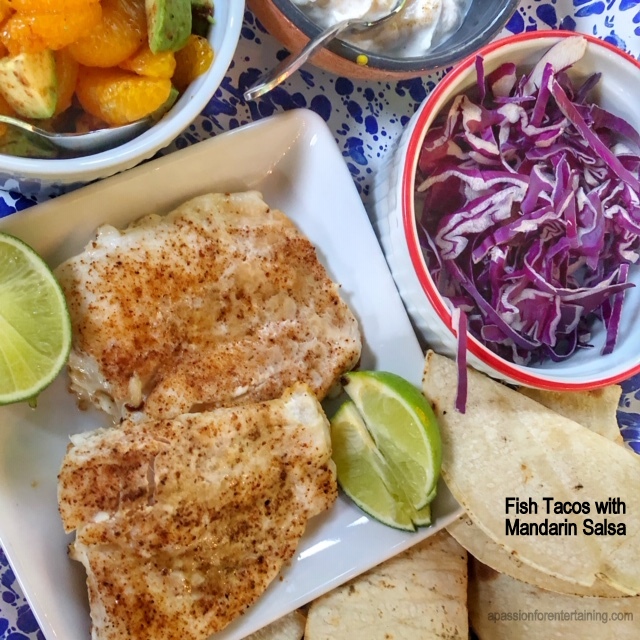
Celebrate Cinco de Mayo with Grilled Fish Tacos with Mandarin Salsa

I wish I had kept a log starting on day one of all of the dinners I have cooked since staying at home. This is by far the longest stretch of cooking I think any of us have encountered. So, for Cinco de Mayo celebrations this week here is a quick, easy and delicious recipe.

Grilled Fish Tacos with Mandarin Salsa

Ingredients

  • SALSA
  • 1 15 oz can mandarin oranges, drained
  • 1 avocado, diced
  • 1-2 tablespoons finely chopped red onion (optional)
  • 1 teaspoon chili powder
  • YOGURT CREMA
  • 3/4 cup plain greek yogurt
  • 1 tablespoon lime juice, freshly squeezed
  • 2 teaspoons cumin
  • FISH
  • 1 piece white fish fillet per person, haddock, cod or what you have on hand
  • 1 tablespoon oil
  • cumin, chili powder and salt
  • corn tortillas
  • 1 – 1 1/2 cup shredded red cabbage

Instructions

  1. Salsa – combine the mandarin oranges, diced avocado, red onion and chili powder in a bowl, mix to combine.

    Yogurt Crema – combine the yogurt, lime juice and cumin, mix to combine

  2. Grilled Fish – Preheat your grill or oven to 350 degrees. In a cast iron skillet large enough to fit the fish fillets, drizzle the skillet with oil. Add the fillets and dust the fillets lightly with cumin, chili powder and salt. Grill or bake for 8 – 10 minutes or until the fish flakes easily.

  3. How to serve you tacos

    Heat the corn tortillas over the grill – turn the tortillas with tongs until lightly charred on both sides. This can also be done over a gas flame or in a dry skillet. Set warm tortillas in a towel-lined basket to keep warm.

    Place the shredded cabbage, salsa, and yogurt crema in serving bowls along side the fish and tortillas.

Today is National Pretzel Day!

Ready to try your hand at making soft pretzels? This recipe is easy and the results are spectacular.  To make these even more enticing, add dipping sauces of your choice.  Your family will go crazy for these.  You see the lines in the malls (when they are open!) for the soft pretzels, make them at home and you just might have a new requested treat.  Enjoy!

Soft Pretzels

Ingredients

  • 1 package rapid rise yeast
  • 1 1/2 cups warm water
  • 1/4 cup brown sugar
  • 4 – 4 1/2 cups flour
  • baking soda
  • kosher salt
  • 1 egg, beaten and mixed with 2 tablespoons of water

Instructions

  1. Preheat oven to 450 degrees.

    In a mixing bowl, combine yeast, warm water, and brown sugar. Let stand for 5 minutes. Add flour and mix with a dough hook until smooth. (if you do not have a mixer with a dough hook, by hand – gradually add flour and stir until all is incorporated. Knead dough until the mixture is smooth). Let stand 5 minutes. Fill a non-reactive deep sauce pan with water, add 2 tablespoons of baking soda for each cup of water, bring to a boil. Divide dough into 12 even pieces. Roll each piece into a long rope (approx. 18 – 24 inches), twist into a pretzel shape, pinch ends to seal. Drop each pretzel into the boiling water for 10 seconds. Remove with a slotted spoon and arrange on a greased baking sheet. Brush each pretzel with egg wash and sprinkle with salt. Bake at 450 degrees for 8 minutes or until golden brown.

    Note – If you are not planning on serving these immediately, bake without the sprinkle of salt on top. When you are ready to serve, warm the pretzels in the oven, brush with melted butter and sprinkle with salt.

Cooking from My Pantry – Pineapple Cupcakes

I have been trying various methods for delivery and food pick-up to avoid going to the grocery store. Sometimes it is not the easiest thing to do. I ordered all purpose flour and self-rising flour was delivered. I certainly did not want five pounds of self-rising flour. However, as the saying goes “when you have lemons, make lemonade” – so I decided to switch around my pineapple cake recipe and use the self-rising flour instead of mom’s original recipe that uses baking soda. The results were terrific. One of our favorites and during this time of cooking from my pantry, a great recipe substitution was found.

5 from 1 vote
Print

Pineapple Cupcakes

Servings 20

Ingredients

  • 2 cups self-rising flour
  • 2 cups sugar
  • 2 large eggs, lightly beaten
  • 1 20oz. can crushed pineapple, with juice
  • 1 teaspoon vanilla extract

Instructions

  1. Preheat oven to 350 degrees. Line muffin tin with 20 cupcake liners. In a mixing bowl combine the flour and sugar, add the eggs, pineapple and vanilla extract. Mix until well blended, scoop into liners (approximately 3 tablespoons per liner). Bake cupcakes for 25 minutes or until a cake tester comes out clean. Cool and frost.

  2. Use can also use all purpose flour instead of the self- rising flour.

    Use 2 cups of all purpose flour and add 2 teaspoons of baking soda in place of the self-rising flour

    Instead of cupcakes this recipe will make one 9 x 13 cake – bake 30 minutes or until a cake tester comes out clean.

5 from 1 vote
Print

Cream Cheese Frosting

Ingredients

  • 1 8 oz. package cream cheese, room temperature
  • 1/4 cup butter, room temperature
  • 2 teaspoons milk
  • 1 teaspoon vanilla extract
  • 4 cups powdered sugar

Instructions

  1. Beat cream cheese, butter, milk and vanilla a medium size mixing bowl on low speed until smooth. Gradually add powdered sugar, one cup at a time, until frosting is smooth and spreadable.

Cooking from My Pantry – Flour Tortillas

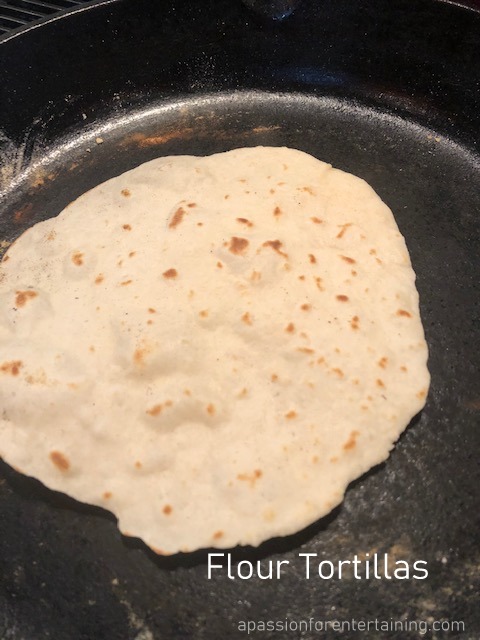
This cooking every meal, every day, is quite a cooking challenge. As much as I love to cook, I also love to go out to dinner! Well, the last part of that statement is on hold for now. So, back to the drawing board to decide what to cook for dinner. I was thinking Mexican, but hard to have a Mexican dinner without tortillas. I did remember a recipe I picked up when we lived in Texas for flour tortillas. Out it came and it was time to try making flour tortillas! I had all of the ingredients on hand and figured that this was the perfect day to make tortillas. The dough is surprisingly easy to prepare and the results are fantastic. I think my rolling technique will improve with practice, it is hard to roll them out into a perfect circle. However, that is the joy of something being homemade as opposed to manufactured. A great project during this day at home.

Flour Tortillas

Servings 12

Ingredients

  • 2 cups flour
  • 1 1/2 teaspoon salt
  • 1 1/2 teaspoon baking powder
  • 5 tablespoons shortening
  • 3/4 cup very hot water

Instructions

  1. I prepared this in my Kitchenaid mixer with the wire whisk.

    Combine the flour, salt and baking powder in the mixer and whisk. Add the shortening and mix on medium speed until the shortening is the size of peas. (This can also be done with a pastry blender or with your hands, if not using a mixer) Slowly add the hot water and combine until it forms a dough. Remove the dough from the bowl and place on a floured surface, knead, until smooth. Roll into a ball, cover with plastic wrap sprayed with cooking spray, and cover and let rest for 20 minutes. Divide dough into 10 – 12 balls about the size of a golf ball. Cover and let rest for an additional 20 minutes. Preheat a cast iron skillet over medium heat. Flour the surface you will be rolling them on. Roll each ball into an oval and then turn and roll, turn and roll until you have a circle. The dough should be very thin. Put the tortilla in the hot pan and cook approximately 30 seconds per side, the dough will puff and have golden brown spots; that is when it is time to flip the tortilla. Remove from the skillet and repeat with the remaining dough. Cover the tortillas with a towel to keep warm or wrap in foil.

Cooking from My Freezer – Baked Pork Chops

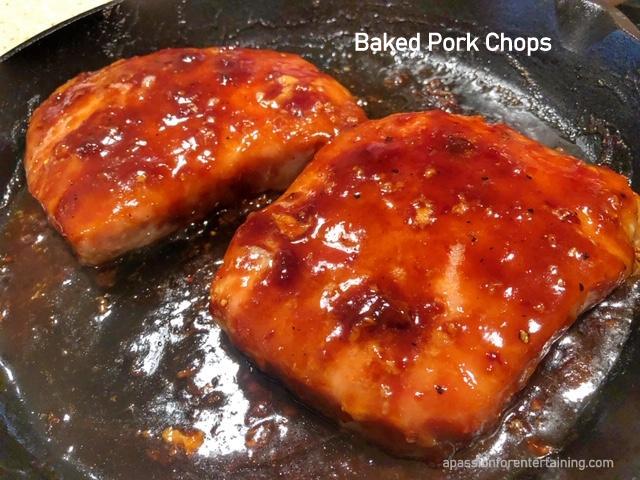
I have always been the one that stops by the grocery store almost daily to pick-up what we needed that day. If you had told me I would be limiting my trips to once or twice a month, I would have rolled my eyes in disbelief. Well, the time is now and I haven’t been to a store for over two weeks. I must say my last trip was quite substantial but like all of us, we are making do with what we have. I have always had a well stocked pantry, I think this rubbed off on me from my mom. I grew up in the snow-belt where it was common to have over 250 inches of snow each year. She always had a stocked pantry in case we could not get to the store. Well, into my freezer I go – this time I found a package of boneless pork loin chops. I thawed the chops and decided to bake them since the weather was looking like a storm was brewing. I made a tangy tomato barbecue sauce, placed the chops in my cast iron skillet, topped them with the sauce and baked them for 30 minutes. I have to say they were some of the best pork chops I have made. As they say, necessity is the mother of invention!

Baked Pork Chops

Servings 4

Ingredients

  • 2-4 pork chops
  • 2 tablespoons soy sauce
  • 1 tablespoon Worcestershire sauce
  • 1 clove garlic, minced
  • 1/4 cup ketchup
  • 1/2 cup brown sugar
  • 1 teaspoon dry mustard
  • 1/4 teaspoon salt
  • 1/4 teaspoon freshly ground black pepper

Instructions

  1. Preheat oven to 350 degrees. Combine all of the sauce ingredients. Place chops in a cast iron skillet or in a baking pan. Spread sauce over chops. Bake for 25 – 30 minutes or until the internal temperature reaches 145 degrees. Spoon sauce over chops a few times while baking.

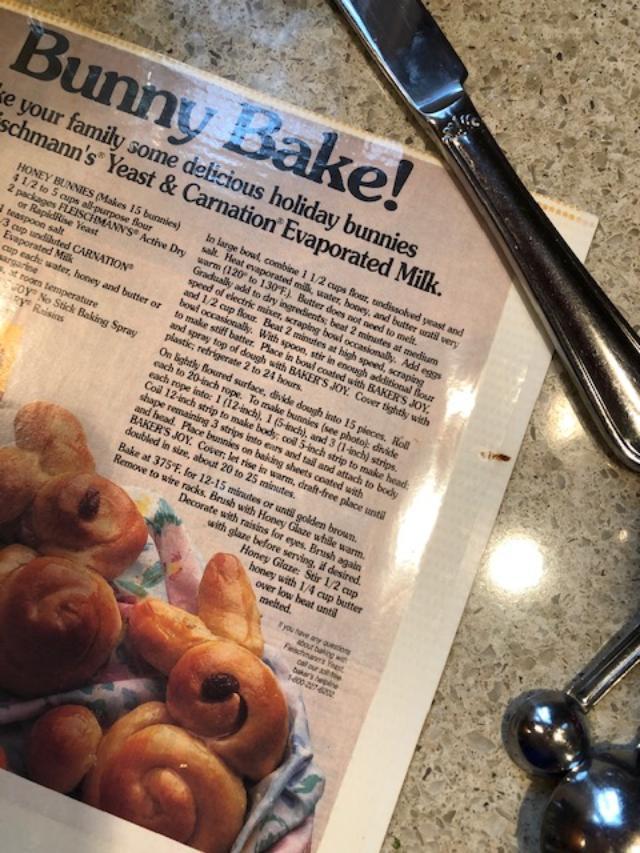
Interesting Find – Recipe for Honey Bunnies

I cut this recipe out of a magazine many years ago, it was a feature for Fleischmann’s yeast Bunny Bake. I made these when my children were young. I just ran across the recipe in one of my files (I have lots of time at home to go through recipes now that I am staying home!). I thought it would be a great recipe to post. I checked the Fleishmann’s website and found the recipe for Honey Bunnies. Below is a photo of my original recipe and the bunnies I just made. For the entire recipe check out the Fleishmann’s site. It is a great recipe for spring and Easter baking.

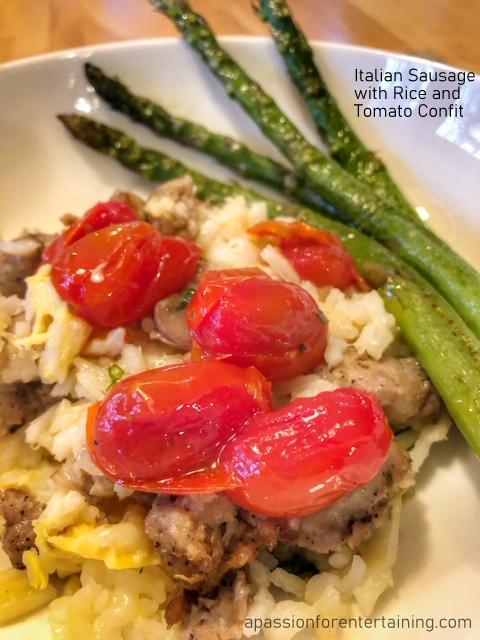
Cooking from My Pantry – Italian Sausage with Rice and Tomato Confit

My morning started trying to decide what to do with two cups of cherry tomatoes. I also had Italian Sausages in my refrigerator and during this time staying home with limited trips to the store, it is time to cook with what I have on hand. I roasted the tomatoes and made a casserole of Italian Sausage and Rice. I rarely make a casserole, however, it just seemed like we needed a bit of comfort food. A great combination and a wonderful satisfying dinner.

Remember, if you do not have fresh herbs, you can always substitute dried herbs you might have on hand. Use brown rice instead of white rice or ground beef/chicken/turkey for the sausage. It is time to be creative in the kitchen!

Italian Sausage and Rice

Servings 4

Ingredients

  • 1 medium onion, chopped
  • 1 tablespoon olive oil
  • 8 ounces mushrooms, sliced (optional)
  • 1 pound Italian sausage, remove casings
  • 2 cups cooked rice
  • 2/3 cup mozzarella cheese, diced or shredded
  • 1 tablespoon Italian parsley, minced
  • 2 eggs, beaten

Instructions

  1. Preheat oven to 300 degrees. Saute onion and mushrooms in oil until tender. Add sausages in small pieces and break apart while cooking, cook until browned, drain. In a mixing bowl combine rice and cheese, add sausage mixture. Transfer mixture to a greased 2 quart baking dish. Combine eggs and parsley, pour over rice-sausage mixture. Bake for 30 – 40 minutes. Spoon into bowls and top with tomato confit.

Tomato Confit

tomatoes are slow-cooked with olive oil, garlic, and herbs into a luxuriously rich condiment

Ingredients

  • 2 cups cherry tomatoes
  • 2 springs fresh rosemary
  • 2 springs fresh thyme
  • 2 garlic cloves, smashed
  • 2 tablespoons olive oil
  • salt and pepper

Instructions

  1. Preheat oven to 425 degrees. Combine all of the ingredients in a baking pan – approximately 8 x 8. Bake for 25 minutes. Remove garlic, rosemary and thyme. Leftovers can be refrigerated, bring to room temperature prior to serving.

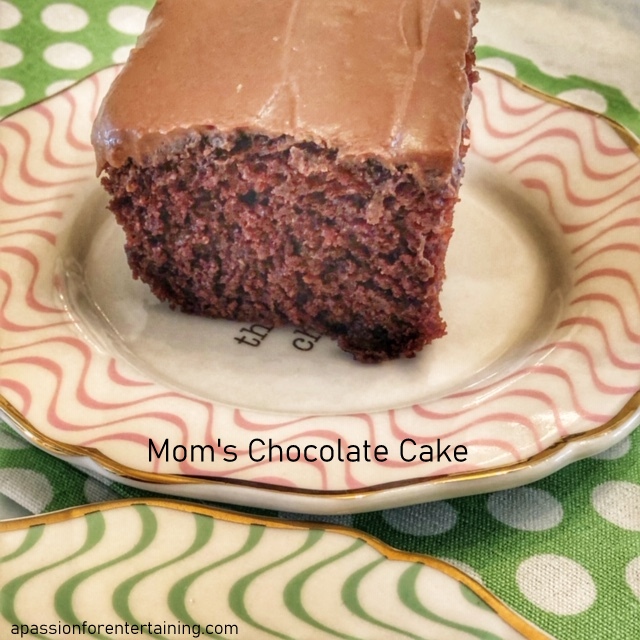
Baking from My Pantry – Mom’s Chocolate Cake

I keep seeing that many are still looking for eggs and that many markets are out of eggs. That reminded me of my Mom’s one dish Chocolate Cake. Out came my recipe box and there was the recipe, chocolate stains and all. I remember vividly making this cake growing up, she always mixed and baked the cake in the 8 x 8 inch pan. It is extremely easy to make and the results are great. While we are home, it is time to bring back the recipes from years ago when they were always conserving and using what they had in their pantries.

My beloved recipe box – check out the well used recipe card!

Mom’s Chocolate Cake

Servings 9

Ingredients

  • 1 1/2 cup flour
  • 1 cup sugar
  • 3 tablespoons cocoa powder
  • 1 teaspoon baking soda
  • 1 teaspoon salt
  • 6 tablespoons vegetable oil
  • 1 tablespoon vinegar
  • 1 teaspoon vanilla extract
  • 1 cup cold water

Instructions

  1. Preheat oven to 350 degrees. Mix the dry ingredients in an 8 x 8 inch cake pan. Make three wells is the dry ingredients – add the oil, vinegar and vanilla in each well. Add water. Stir in the pan until thoroughly incorporated.

    Bake the cake for 30 minutes. Cool completely – frost with your favorite frosting or dust with powdered sugar.

Mocha Frosting

the perfect frosting for Mom's Chocolate Cake

Ingredients

  • 2 tablespoons butter, softened
  • 2 tablespoons cocoa powder
  • 1 1/2 cup confectioners sugar
  • 1/3 cup brewed coffee

Instructions

  1. Combine all in a mixing bowl (add coffee one tablespoon at a time until desired consistency) and mix on high until light and fluffy. Frosts one 8 x 8 inch cake.

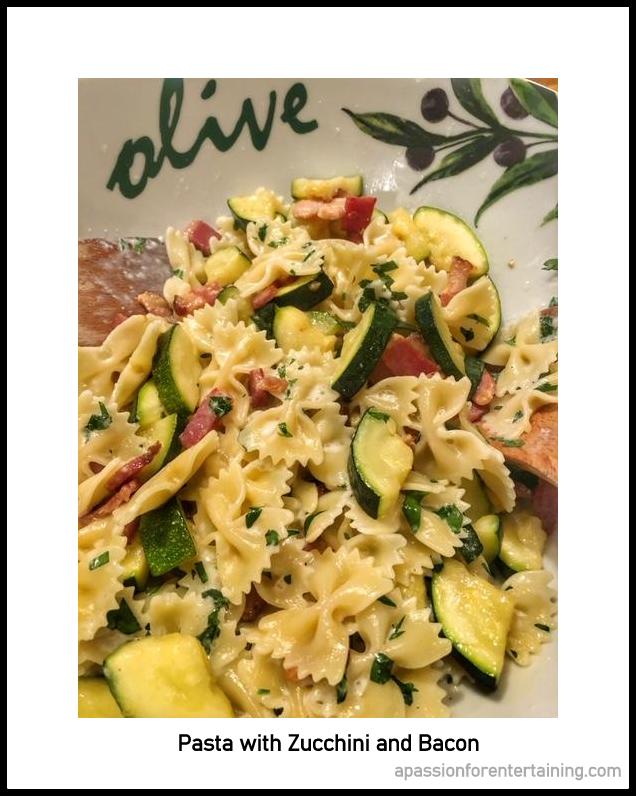
Cooking from my Pantry – Pasta with Zucchini and Bacon

Once again, I took a long hard look into my pantry and refrigerator to see what I had on hand. I have an abundance of pasta, so out came a box. A looked into my refrigerator and found bacon, zucchini, cream, grated Parmesan and parsley. So, I combined it together for a wonderful pasta dish. No zucchini, you can certainly substitute any vegetable you have on hand. Any leftovers, make a cold pasta salad tossed with a bit of olive oil.

Pasta with Zucchini and Bacon

Servings 4

Ingredients

  • 4 slices bacon, diced
  • 1 zucchini, cut horizontally and then into into slices
  • 2 tablespoons butter
  • 1/2 cup grated Parmesan cheese plus a bit more to top each dish
  • 1/4 cup minced Italian parsley
  • 1/3 cup heavy cream
  • 1 pound pasta

Instructions

  1. In a large skillet, cook the bacon over medium-high heat until almost crisp. Add the butter, stir until melted, then add the zucchini, cook until lightly browned, stirring frequently. Cook your pasta in salted boiling water according to package directions, drain. In a large pasta bowl, add the minced parsley and cheese. Add the cooked pasta and cream, stir well. Remove the bacon and zucchini with a slotted spoon from the skillet and add to the pasta mixture. Toss and serve. Top with additional grated cheese.

!