Ham, Egg and Cheese Roll-ups

 If you are anything like me, I am always brainstorming what to serve over the holidays.  I especially like things that are easy to make, require minimum preparation and taste delicious.  I have made spinach roll-ups overs the years using puff pastry, this time I am making breakfast Ham, Egg and Cheese Roll-Ups.  I happened to have a few slices of honey ham in our refrigerator so this time I am using ham.  You can add cooked bacon if you prefer or a combination of vegetables.  If you prefer vegetables like peppers and onions, saute first and them add to the filling.  You can’t go wrong with this recipe. 


Ham, Egg and Cheese Roll-ups

Ingredients

  • 1 sheet frozen puff pastry
  • 1 cup shredded sharp cheddar cheese
  • 1 tablespoon minced Italian parsley
  • 1/2 cup minced ham
  • 1 recipe fluffy scrambled eggs
  • egg wash, 1 egg mixed with 1 tablespoon water
  • Fluffy Scrambled Eggs
  • 5 eggs
  • 1/8 teaspoon kosher salt
  • 2 tablespoons milk
  • 1/2 tablespoon unsalted butter
  • freshly ground black pepper

Instructions

  1. Thaw puff pastry as directed on package.   Preheat the oven to 400 degrees. When the pastry has thawed, cover the pastry with the cheese, ham and parsley.  Cook the eggs as directed, let cool for 4 minutes.  Then layer the eggs on top of the cheese and ham.  Salt and pepper, if desired. You will roll from the short side of the pastry.  Brush the ends of the pastry with egg wash to seal the roll.  Now, carefully roll the mixture, if some of the filling falls out, you can tuck the filling back in   When you get to the end rolling, pinch the edges to seal.   Cut the roll into  8 slices.  Place the slices on a parchment lined baking sheet.  Brush each roll-up with the egg wash. Bake rolls for 25 - 30 minutes.  Serve warm. -----

    EGGS -In a small bowl, beat eggs with milk and salt.  In a medium skilled, melt butter over medium high heat until foamy. Add eggs, continue stirring until fluffy curds form and eggs are fully cooked, about 3-4 minutes.  Season with pepper. 

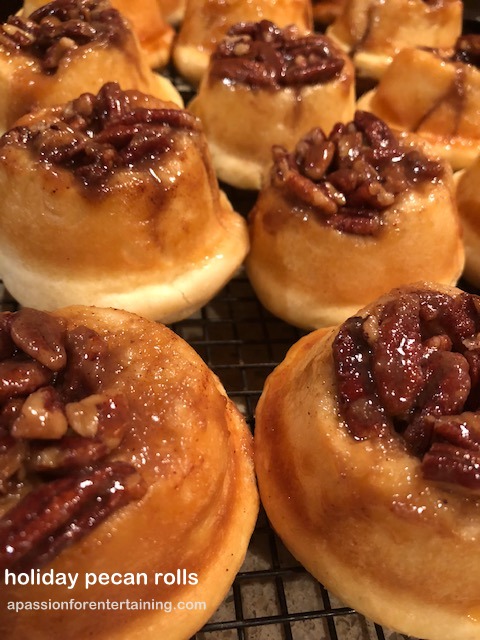
Holiday Pecan Rolls

 The month of parties has arrived.  Holiday Pecan Rolls are perfect for a holiday brunch, office treat or gifts for your neighbors.  

Holiday Pecan Rolls

Servings 16

Ingredients

  • DOUGH
  • 3 - 3 1/2 cups flour
  • 1 teaspoon salt
  • 1/2 cup warm water
  • 1 package dry yeast
  • 1/2 cup milk
  • 3 tablespoons unsalted butter
  • 3 tablespoons sugar
  • 1 egg, beaten
  • FILLING
  • 1/4 cup butter, softened
  • 1/4 cup sugar
  • 3 teaspoons cinnamon
  • TOPPING
  • 3/4 cup brown sugar
  • 1/2 cup heavy cream
  • 1 cup chopped pecans

Instructions

  1. Grease 16 muffin cups.  DOUGH - In a stand mixer with a dough hook or in your food processor, combine 3 cups flour and salt.   Combine yeast with the warm water and set aside.  Heat milk, sugar and butter - put in a microwave safe cup - heat on high for 50 seconds.  Slowly pour the milk mixture into the flour mixture.  Add egg,  then add the yeast mixture.   Process for approx. two minutes until the dough pulls away of the bowl.  Add additional flour if the dough does not pull away from the sides of the bowl. Place dough in a large greased bowl, cover and let rise for 30 minutes.  Combine the topping ingredients, brown sugar, cream and pecans.  Divide this mixture into the 16 greased muffin cups.  Once the dough has risen, roll into a 8 x 20 inch rectangle on a lightly floured surface.  Spread the butter over the dough and sprinkle with the cinnamon sugar mixture.  Roll lengthwise, pinch edges to seal, cut into 16 pieces.  Place one roll into each of the prepared muffin cups.  Cover and let rise for 30 minutes.  Preheat oven to 350 degrees.  Bake the rolls for 18 - 20 minutes.  Immediately invert the pans onto foil lined baking sheets.  Tap the pans slightly and the rolls will pop out of the pans. Scrape any remaining topping mixture onto the rolls.  These are great served warm or at room temperature.

Interesting Find – Retro Donuts, Lewisburg, VW

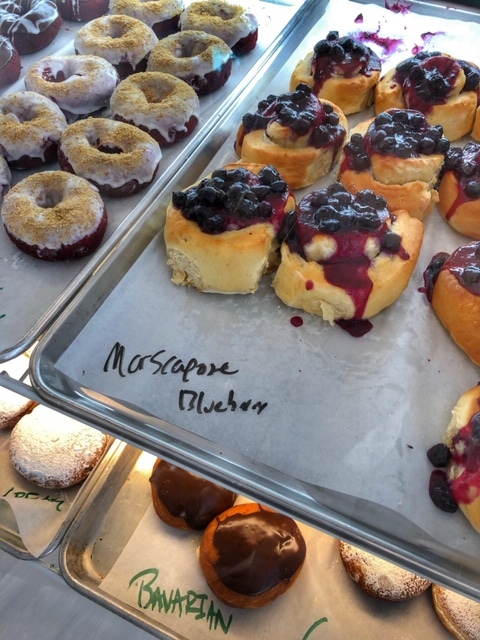
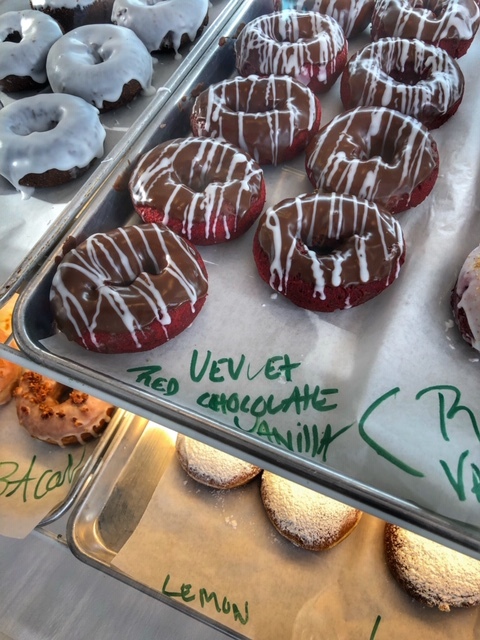
During a recent trip through West Virginia we happened upon a very Interesting Find – Retro Donuts.  There are two things I always search out on a road trip – fried chicken and donuts.  Why you ask?  Well, I find that those two items are two of the best where you can find local traditional food that is not from a box, can or chain restaurant.  I have had some of the best fried chicken out of fryers in gas stations, and donuts from local bakeries that are creating new and interesting taste sensations.  Retro Donuts was just that kind of find.  After finding them on the internet, we put their address in our GPS and we were on our way.  Inside an unassuming building we found a sparkling clean, well appointed, classic donut shop that looked like it was out of the 1950’s with music to match.   However, once I took a look at their selection I could tell this was not your typical shop.  Flavors such as mascarpone blueberry, maple bacon and red velvet with chocolate and vanilla are not the flavors from the past.   They also offer delicious organic, fair trade coffees and espresso along with a great menu.  It was probably one of the friendliest spots I have visited in a long time.  As I was pouring my coffee, a gentleman was telling me how much he loves the coffee and that we is a daily customer.  I also met Arthur Forgette as I was getting my second cup of coffee.  Arthur is the proprietor and comes from a vast background in the culinary world who settled in Lewisburg with his love, Debbie Porter.  Besides Retro Donuts they have an award winning restaurant in Lewisburg the French Goat and a bed and breakfast Maison Marcel.  After my brief conversation with Arthur and his passion for what he does, I cannot wait to return to their other two ventures.  If they are anything like Retro Donuts,  they are well worth the drive. 


Entertaining Holiday Gift Guide 2018

Are you looking for a gift for someone who loves food and entertaining this holiday season?

After searching, trying and tasting my way around the country – here are my favorites for 2018.


Glassybaby

I was intrigued by Glassybaby after I happened to find them on the internet.  Their product and their story was one that really peaked my interest.  During a recent trip to Seattle, WA we visited their Medrona, WA shop and spent time watching each glass votive being made and learning how Glassybaby came to be.  Lee Rhodes, who started Glassybaby was battling cancer and during this time, her husband was also dealing with the stress of seeing a loved one battle the disease.  He enrolled in a glass blowing glass as a means to relieve stress.  When he came home with hand blown votives, Lee loved them and started to pass them along to other cancer patients.  They then starting selling them to help women dealing with cancer purchase wigs and other things they might need while going through treatments. This was the inspiration behind Glassybaby – and to this day they are devoted to giving hope, beauty, kindness and million of dollars to help people, animals and the planet. 

Each hand-blown glass votive is a work of art. as unique as the individual who chooses one, formed by eight hands, born in the USA, citizen of the world, each with its own name, one of a kind. kind of like you.  They arrive beautifully packaged and ready to give.  A perfect gift for anyone on your gift list!

Glassybaby weddings


Wonderbag

I know I have mentioned previously all of the inquiries I get regarding products and their desire to have me try them.  I read them all and when one really peaks my interest, I reply back that I would love to try their product.  Wonderbag was just one of those products.  

potselection.jpg

The Wonderbag is a unique powerless slow cooker that gives you the healthiest meals possible. It continues to cook food, which has been brought to a boil by conventional methods for up to 12 hours, without the additional use of additional electricity.  No plugs. No fuss. By freeing up time spent cooking, the Wonderbag can make your life easier and transform lives of women in Africa. For every Wonderbag purchased in the developed world, a contribution is made to the Wonderbag Foundation – supporting the donation of bags to families in need throughout Africa. Their mission statement says it all:

Our mission is simple: to economically empower women and girls across the world by addressing the critical daily challenges of time poverty, self worth and cleaner, healthier cooking. We are about finding, supporting and innovating culturally relevant solutions to life’s challenges for communities around the world. 

Our mission is supported by the Buy One, Give One model – for every Wonderbag purchased, a donation is made to the Foundation in order to support Wonderfeasts and subsidize Wonderbags to communities across the world one community at a time.

This is a great gift for tailgaters, boaters, campers, and picnic lovers – a great take along to keep your food hot or cold.  Check out their website for all of the great ways you can use this product and recipes.

Beautiful Briny Sea

This year when at the Atlanta Mart I happened to walk by and immediately had to stop when I saw this wonderful assortment of salts  at Beautiful Briny Sea.  I must admit, the Unicorn salt is one of my favorites.  I like to sprinkle Unicorn salt over avocado toast, the Campfire salt is great on grilled corn.  
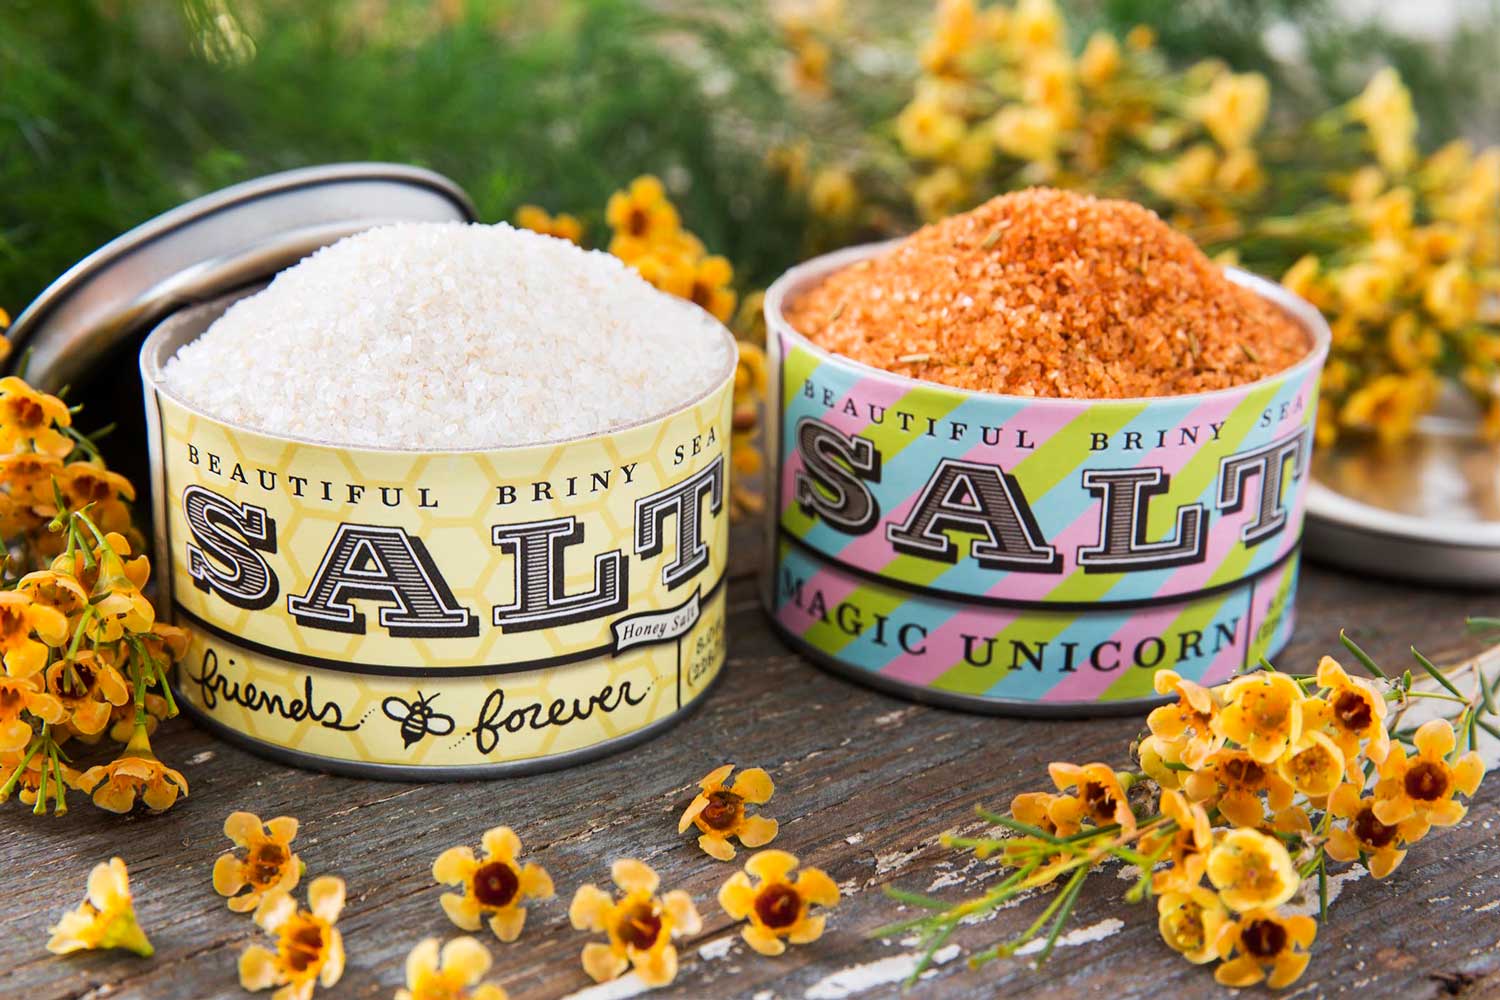
4.jpg

Their Story:

Beautiful Briny Sea is an artisan dry goods company based in Atlanta, Georgia. Our small-batch salt blends, sugars, and other culinary products are made with integrity, sustainability and a whole lot of love.

Our humble beginnings date back to 2011, when restauranteur Suzi Sheffield decided to seek new adventures while continuing to pursue her culinary passion. Armed with a boatload of creativity, a love for all things homemade, and a flair for whimsy, Suzi brought Beautiful Briny Sea and its beloved small-batch sea salts to life in a studio in Atlanta’s Old Fourth Ward.

Since then, their product line has expanded to include twelve salt batches, as well as a handful of various other sundries and specialty goods. Suzi’s always dreaming up new concoctions in the Salt Shack, so keep your ear to the ground for upcoming products, fun collaborations, and other new projects.


Marcella Kriebal

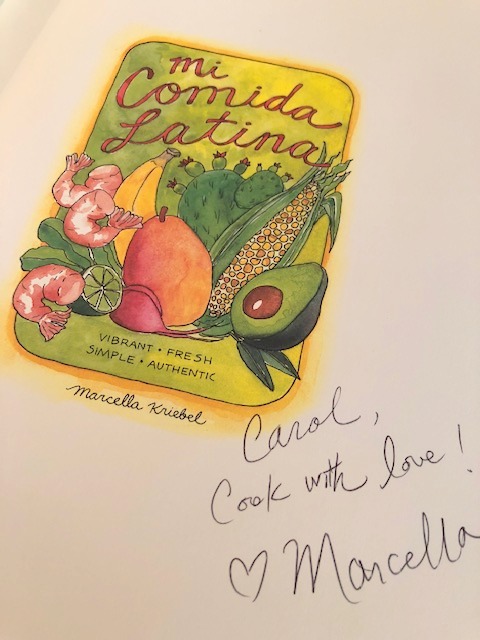
Art work and cookbooks by Marcella Kriebal first came to my attention when I was shopping at Union Market in Washington, DC.  That day, Marcella was selling her unique pieces of art and her Mi Comida Latina cookbook.  I purchased one of her cookbooks and to this day, it graces my kitchen.  The recipes are unique and delicious and the artwork is just beautiful to look at.  


This unique cookbook is both a work of art and valuable reference book. It features over 100 hand drawn recipes from Marcella’s Travels throughout Latin America.

This collection includes many of Marcella’s favorite dishes, desserts, and drinks inspired by her travels in Central and South America; tamales, ceviche, empanadas, flan and many more favorites from countries including Mexico, Colombia, Ecuador, Peru and Puerto Rico. She has also included lots of pages about ingredients that are less common in the US including prickly pear, yuca root, and epazote. 

 Above is just one example of her beautiful works of art. 


Piedmont Provisions

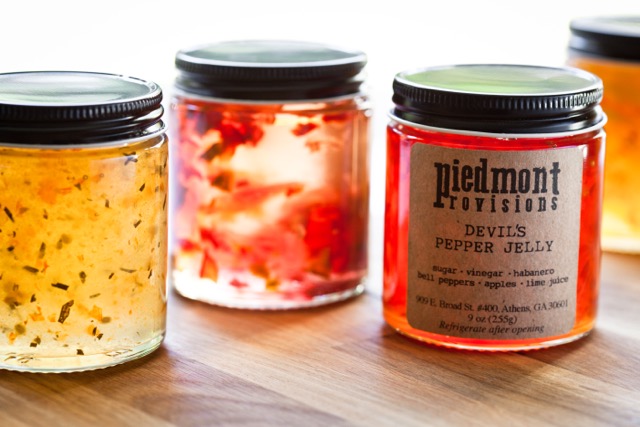
Piedmont Provisions is based in lovely Athens, GA. They are one of our favorites from from South.  I previously noted in a recent recipe how much we love their Peach Cobbler jam.  Their preserves are created using traditional methods and hand-hammered copper pots, which allow the true fruit flavor to shine without being overly processed.  Easy to purchase online, I have purchased numerous times and always delicious.  A perfect holiday gift or hostess gift
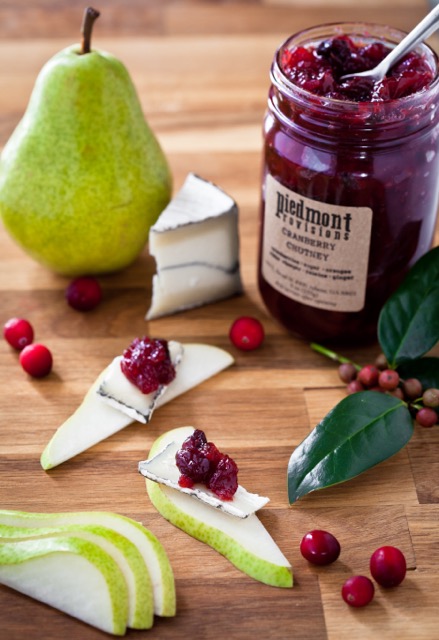
.


Cranberries, Cranberries, Cranberries

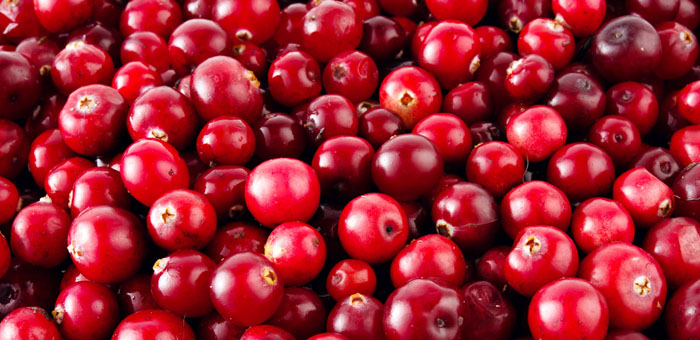
This is the time of year that cranberries start cropping up everywhere, in recipes, markets, and advertisements.

cranberry fun facts

Cranberries – Here are a few fun facts-

  • Cranberries are one of the few fruits native to North America.
  • The 5 states known for growing cranberries are: Massachusetts, Wisconsin, New Jersey, Oregon, and Washington.
  • Cranberries have small pockets where air seeps into that allows them to float.
  • Cranberries do not grow in water.
  • Cranberries are approximately 90% water.
  • Cranberries are typically in season from October until December.
  • Only about 5% of cranberries are sold fresh while the rest are turned into cranberry juice, sauce, etc.
  • November 22 is National Cranberry Relish Day.
  • Americans consume 400 million pounds of cranberries each year. 20 percent are eaten during Thanksgiving week.
  • The cranberry is one of three fruits native to North America. The other two are the Concord grape and the blueberry.
  • There are approximately 333 cranberries in a pound, 3,333 cranberries in one gallon of juice, 33,333 cranberries in a 100-pound barrel.
  • Cranberries can be stored in the refrigerator for up to one month, or in the freezer for up to nine months.

So, I thought I would bring out a few fun recipes using this native fruit.

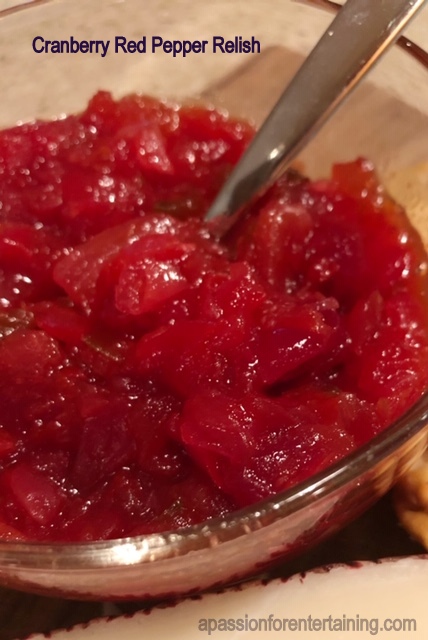
On a recent trip to Napa Valley we had a delightful brunch at the CIA Copia in downtown Napa.  There we were served cheddar biscuits with ham and pepper jelly.  I am going to make these over with holidays with Cranberry Red Pepper Relish.  Cranberry Red Pepper Relish is the perfect accompaniment to ham or poultry.  Try is on a turkey sandwich – delicious!

Cranberry Red Pepper Relish

5 from 1 vote
Print

Cranberry Red Pepper Relish

makes 1 1/2 pints

Ingredients

  • 2 red peppers, seeded and finely diced
  • 2 cups cranberries, coarsely chopped
  • 1 medium onion, chopped
  • 3/4 cup sugar
  • 1 small jalapeno pepper, minced, seeds removed
  • 1/4 teaspoon salt
  • 1/4 teaspoon pepper

Instructions

  1. In a saucepan combine all ingredients.  Bring to a boil and simmer for 30 - 40 minutes, stirring occasionally.  Cool and store in the refrigerator. Terrific served with poultry or ham.


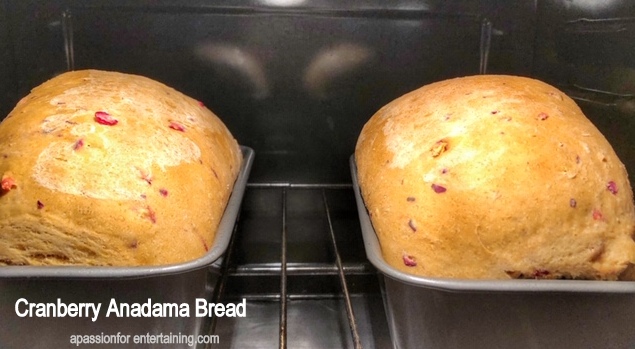
Cranberry Anadama Bread

My mom always loved to bake Anadama Bread.  This version, I added the addition of cranberries. This simple loaf of flour, cornmeal, yeast, and molasses has graced New England kitchens for years where it originated.  This hearty bread is great for sandwiches, and good with any number of soups. The molasses and cornmeal make for a sweet and nutty aroma while it bakes, which carries over into the flavor.


5 from 1 vote
Print

Cranberry Anadama Bread

Servings 2 loaves

Ingredients

  • 1 orange peel, grated
  • 1/4 cup sugar
  • 1 1/2 cups fresh cranberries
  • 2 pkgs. dry yeast
  • 1/2 warm water
  • 1/2 tsp. sugar
  • 1 tablespoon flour
  • 2/3 cup yellow cornmeal
  • 2 1/2 cups boiling water
  • 1/4 cup butter
  • 1/2 cup molasses
  • 1 1/2 teaspoon salt
  • 7 cups flour

Instructions

  1. Mix together the orange peel, 1/4 cup sugar and cranberries in a food processor, pulse 5 - 6 times until the cranberries are evenly chopped.  Dissolve yeast in the warm water.  Stir in `1/2 teaspoon sugar and 1 tablespoon of flour, set aside until bubbly.  Stir cornmeal slowly into the boiling water, stirring constantly, and cook until thickened.  Stir in the butter, molasses and salt.  Cool to lukewarm.  Insert dough hook on stand mixer, add cornmeal mixture and stir until lukewarm.  Add yeast, cranberry mixture and flour - one cup at a time.  When the dough has formed and pulling away from the sides of the bowl, turn into a greased bowl and cover.  Let rise for 50 minutes.  Grease two 9 x 5 inch loaf pans. Turn dough out onto floured surface and knead slightly.  Divide dough into two pieces and place each into greased loaf pans. Cover and let rise for one hour.  Preheat oven to 350 degrees.  Bake loaves for 45 minutes, cool on racks. 

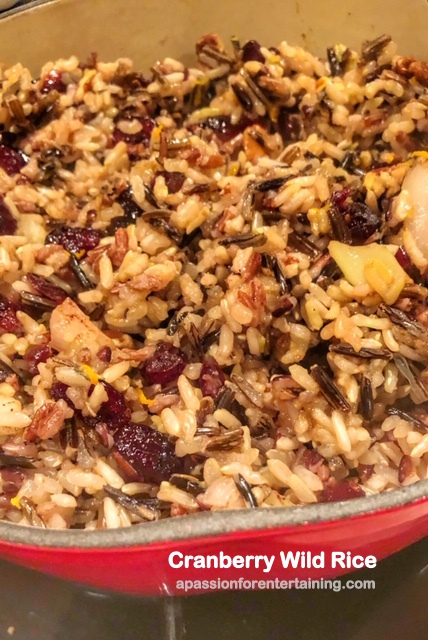
Cranberry Wild Rice

Roasted duck and wild rice was always on our holiday table when I was growing up.  This recipe is a great accompaniment to all poultry and especially during the holidays when everything is just a bit more festive.   It is also great cold as a salad, add cook turkey or chicken to the salad and you have a terrific lunch or main course.  Serving a crowd?  This recipe doubles easily.

5 from 1 vote
Print

Cranberry Wild Rice

Ingredients

  • 4 cups chicken broth
  • 2 cups wild rice blend (wild rice and brown rice)
  • 1 tablespoon butter
  • 1 shallot, minced
  • 1 stalk celery, diced
  • 1/2 cup dried cranberries
  • 1/2 treaspoon ground cinnamon
  • grated zest of 1/2 orange
  • 1 teaspoon dried thyme
  • 1 teaspoon dried sage
  • 1/2 cup chopped pecans
  • salt and pepper, to taste

Instructions

  1. Cook rice as directed on package using the chicken broth for the liquid.  Remove from heat.  Preheat oven to 350 degrees. In a saucepan, saute shallot and celery in butter. Add dried cranberries, cinnamon, orange zest, thyme, sage and pecans.  Mix into rice mixture.  Salt and pepper, to taste.  Spoon into a casserole dish, bake covered for 20 minutes.  Serve.


Praline Pumpkin PIe

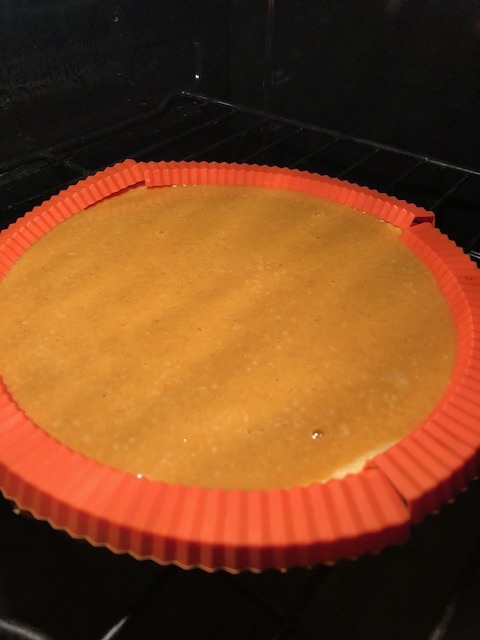
My mom’s recipe collection if full of gems from neighbors and friends.  I have no idea where this recipe originated but remember my mom making this pie during the Thanksgiving holiday.  The praline portion is baked on the bottom then topped with the pumpkin custard with a wonderful addition of brown sugar in the pie.  It is a delightful change from your typical pumpkin pie.  I always cover my crust while baking so the crust does not brown too much.  I love my silicone pie crust shields since they are so easy to use and can go directly into the dishwasher.  I think I purchased mine at a big box bed and bath store years ago.  (My pie pan was a bit small so I had some of the filling left over, do not overfill your crust.)  

I use pie shields which prevent over browning

Praline Pumpkin Pie

Ingredients

  • 1 9-inch pastry crust, unbaked
  • 3 tablespoons butter, room temperature
  • 1/3 cup brown sugar
  • 1/3 cup chopped pecans
  • 3 large eggs, beaten
  • 1 15 oz can pumpkin puree
  • 1/2 cup granulated sugar
  • 1/2 cup brown sugar
  • 1 1/2 teaspoon pumpkin pie spice
  • 1 teaspoon salt
  • 1 12 oz. can evaporated milk

Instructions

  1. Preheat oven to 450 degrees.  Line your pie plate with the pie crust.  Combine the 3 tablespoons of butter and 1/3 cup brown sugar, beat until smooth. Stir in pecans.  Carefully pat into the bottom of the pie shell, bake at 450 degrees for 8 minutes.  Remove from the oven and let stand for 10 minutes.  Combine the eggs, pumpkin puree, sugars, pumpkin pie spice and salt and beat until well combined.  Slowly add the evaporated milk.  Mix until milk is well incorporated. Pour into prepared crust.  Reduce heat to 350 degrees.  Bake pie for 50 minutes or until a knife comes out clean.  Cool.  Serve with whipped cream.


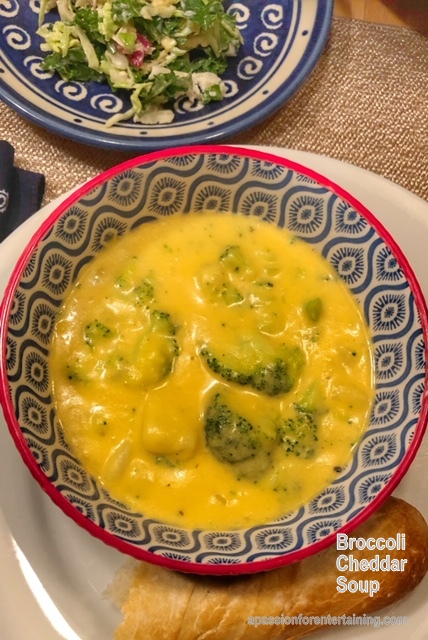
Broccoli Cheddar Soup

Looking for a quick to prepare dinner?  Broccoli Cheddar Soup is a perfect weeknight meal.  Delicious served with warm crusty bread and a salad.  This is a fantastic entree for the busy month ahead, leftovers make a great lunch!


Broccoli Cheddar Soup

Servings 4

Ingredients

  • 2 tablespoons butter
  • 2 cups peeled and diced potatoes
  • 1/2 yellow onion, chopped
  • 2 tablespoons flour
  • 2 cups milk
  • 1 3/4 cups chicken broth
  • 3 cups broccoli, chop florets, thinly slice stems
  • 2 cups shredded Cheddar cheese
  • 1 teaspoon fresh lemon juice

Instructions

  1. Melt butter in a large saucepan over medium heat.  Add potatoes and onion, cook stirring occasionally until onion is tender, about 5 minutes.  Add flour and cook stirring constantly for 2 minutes.  Gradually add milk and broth,  Bring to a simmer and cook until potatoes are tender, approx. 10 -15 minutes, stir occasionally.  Add broccoli and cook until broccoli is tender about 5 - 8 minutes longer.  Remove from heat and stir in cheese.  Add lemon juice, season with salt and pepper.

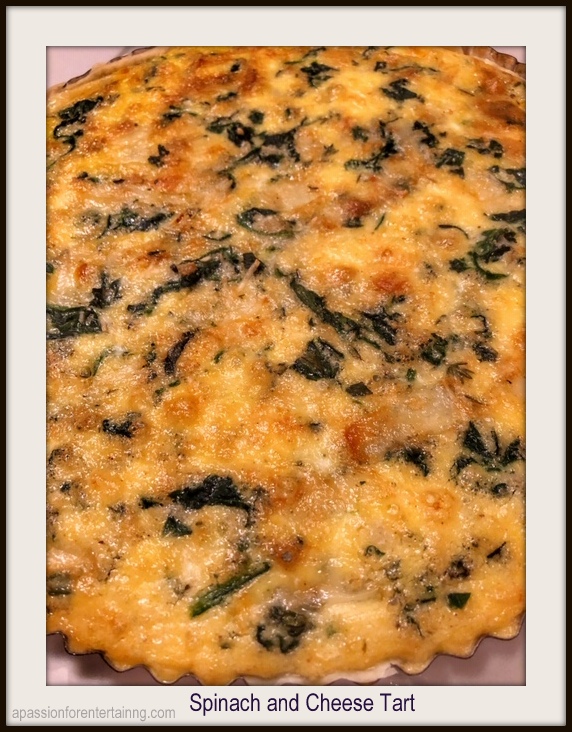
Spinach and Cheese Tart

This recipe is perfect for brunch, lunch or dinner.  Serve with a side salad or fresh fruit for a delightful meal.  The custard and filling can be made a day ahead for easy and quick preparation.


Spinach and Cheese Tart

Servings 8

Ingredients

  • 1 pie crust - rolled to fit a tart pan with removable bottom
  • CUSTARD
  • 2 cups heavy cream
  • 5 eggs
  • 1/2 cup grated Parmesan cheese
  • 1/4 teaspoon fresh thyme leaves
  • 1/2 teaspoon Tabasco sauce
  • 1/4 teaspoon nutmeg
  • 1/8 teaspoon cayenne pepper
  • 1 teaspoon salt
  • FILLING
  • 3 cups spinach, stemmed, chopped and cooked
  • 6 oz. Gruyere cheese, grated
  • 2 tablespoons fresh basil, chopped
  • 1 tablespoon fresh oregano, chopped

Instructions

  1. Combine custard ingredients, mix well.  Combine filling ingredients and place in bottom of tart shell.  Pour custard over filling.  Bake at 300 degrees for 40 - 50 minutes or until golden brown.

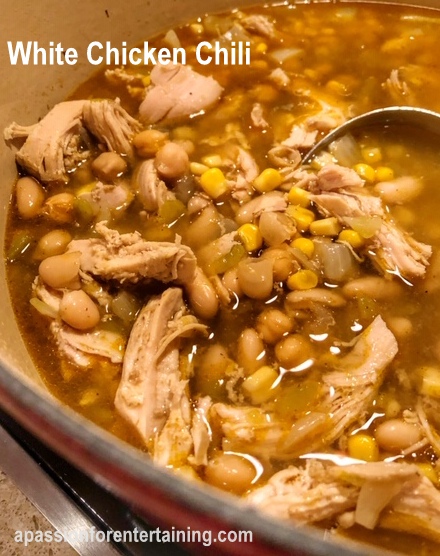
White Chicken Chili

A few days ago, I was on the phone with my daughter and she commented to me that she had the best Chicken Chili at a friends house for dinner.  I immediately started thinking, I have a great White Chicken Chili recipe, but where is it?  I have so many recipes floating around my kitchen, I searched and finally found it.  The problem with my recipes is I write them as I prepare then, not in alpha or categories, someday I will sort them into a better system! This recipe is perfect when time is short, I start this soup on the stove top and finish in the oven.  We prefer our chili on the mild side, if you like more heat, step up the amount of cumin, chili powder and you can even add a pinch or two of cayenne.

White Chicken Chili

Ingredients

  • 1 medium onion, chopped
  • 1 garlic clove, minced
  • 1 tablespoon canola oil
  • 5 cups chicken broth
  • 1/2 teaspoon chili powder
  • 1 teaspoon salt
  • 1 teaspoon pepper
  • 1 teaspoon ground cumin
  • 1 15.5 oz can cannellini beans, rinsed and drained
  • 1 15/5 oz can garbanzo beans, drained
  • 1 4 oz. can chopped green chilies
  • 2 boneless skinless chicken breasts
  • 1 15 oz can corn, drained
  • TOPPINGS
  • grated Monterey Jack cheese
  • diced avocado
  • sour cream
  • hot sauce

Instructions

  1. Preheat oven to 350 degrees.  In a large dutch oven, add canola oil -  saute onion, garlic, cumin and chili powder over medium heat until tender.  Add chicken broth, bring to a boil, add chicken to the mixture, reduce heat to medium, cover and cook for 15 - 20 minutes.  Remove chicken and shred. Return to the broth and add the remaining soup ingredients.  Remove from heat, cover and place in a 350 degree oven for 35-45 minutes.  Serve with desired toppings  Serves 6-8


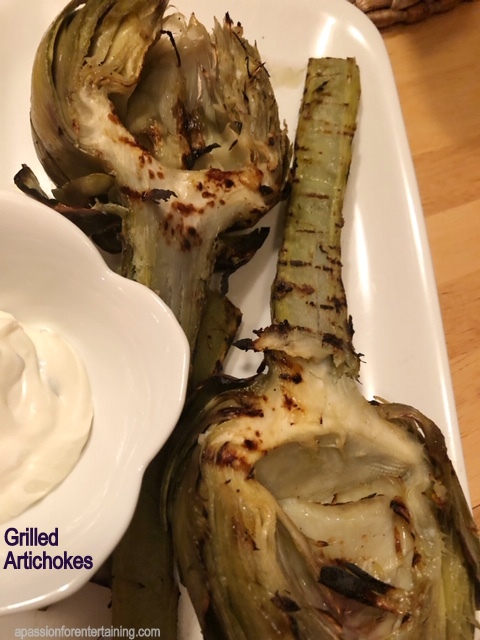
Grilled Long Stem Artichokes

During our recent visit to Napa Valley, we ordered a grilled artichoke as an appetizer at the Farmstead at Longmeadow Ranch.  Served hot, charred, with a dipping sauce, it was delicious.  When shopping yesterday, I purchased a long stem artichoke.  I was thinking the key to a great grilled artichoke must be to precook the artichoke and then grill just prior to serving.  That is exactly what I did and the results we great.  Now I have another favorite grilled vegetable.

Grilled Long Stem Artichokes

Ingredients

  • long stem artichokes (plan one for 2 people)
  • 1 lemon, cut into four wedges

Instructions

  1. Fill a large pot 3/4 full of water, add 2 tablespoons salt and bring to a boil.  While the water is heating, prepare the artichoke.  Cut the end off the the stem, about 1/2 inch off.  Then cut the stem so the artichoke will fit in your pot.  Leave as much stem on the artichoke as you can.  Peel the stem portion you cut off, rub with lemon juice and set aside.  Peel the stem of the artichoke that is still attached, rub with lemon juice.  Cut the top 1/4 off the the artichoke.  Cut 1/4 off of all of the leaves.  Rub the entire artichoke with lemon juice.  Now, put the cut lemon slices you have used into the boiling water.  Put the artichoke(s) and stems in the boiling water, cover, reduce heat slightly and cook for 20-30 minutes or until the heart of the artichoke is tender.  Remove the artichoke(s) from the water and place in a colander upside down to cool.  When cool enough to handle, cut the artichoke in half.  Carefully with a spoon scoop our the fuzzy choke.  Place the cooked artichokes and stems in a zip top bag.  Drizzle with approximately 1/2 cup of olive olive and 2 tablespoons of vinegar, add one minced garlic clove.  Leave in olive oil mixture for 30 - 60 minutes.  Remove when the grill has reached 400 degrees, grill on both sides watching carefully until the artichoke has a slight char on both sides.  Remove, sprinkle with additional salt, if desired.  Serve.   


    Here is how I made my dipping sauce:

    I mixed together equal parts of mayonnaise and sour cream (1/2 cup of each), 1 teaspoon Dijon mustard, 1 teaspoon fresh thyme leaves, squeeze of 1/2 of lemon and salt and pepper.